In the landscape of both architecture and nature, few features convey a sense of timelessness and artistry quite like a dry stack stone wall. These structures are not merely functional; they encompass a rich history and a deep connection to the earth. As you embark on the journey of building your own stunning dry stack stone wall, you will find that each stone holds a narrative, each layer tells a story, and together they create a harmonious dialogue with the surrounding environment. This guide will walk you through the process, imparting techniques and insights that will elevate your project from a mere wall to a masterpiece.
Understanding the Foundations: Purpose and Aesthetic
A dry stack stone wall serves multiple purposes, from providing structural support to enhancing the visual appeal of your landscape. Before diving into the practical aspects of construction, consider the ultimate goal of your wall. Will it serve as a boundary, a terrace, or simply a decorative element? Understanding its function influences the design decisions you will make. In addition, contemplate the natural surroundings. Is your environment characterized by rugged mountains, gentle hills, or a flat expanse? The topography will guide your choice of stone and wall style.
Choosing the Right Stone: A Delicate Balance
The essence of a captivating dry stack wall lies in the stones themselves. Selection is critical. Opt for locally sourced materials if possible; not only does this support local economies, but it also ensures that your wall resonates with the vernacular of your region. Common choices include fieldstone, limestone, granite, and basalt. Each type boasts a distinct texture and color, contributing to the wall’s overall character.
Moreover, the size and shape of the stones matter. Embrace variety; utilize larger stones for structural strength and smaller pieces for filling gaps. The interplay between different dimensions enhances visual interest and stability. Most of all, let your intuition guide you—pick stones that speak to you. Their natural beauty should inspire and infuse your wall with life.
Preparing the Site: Laying the Groundwork
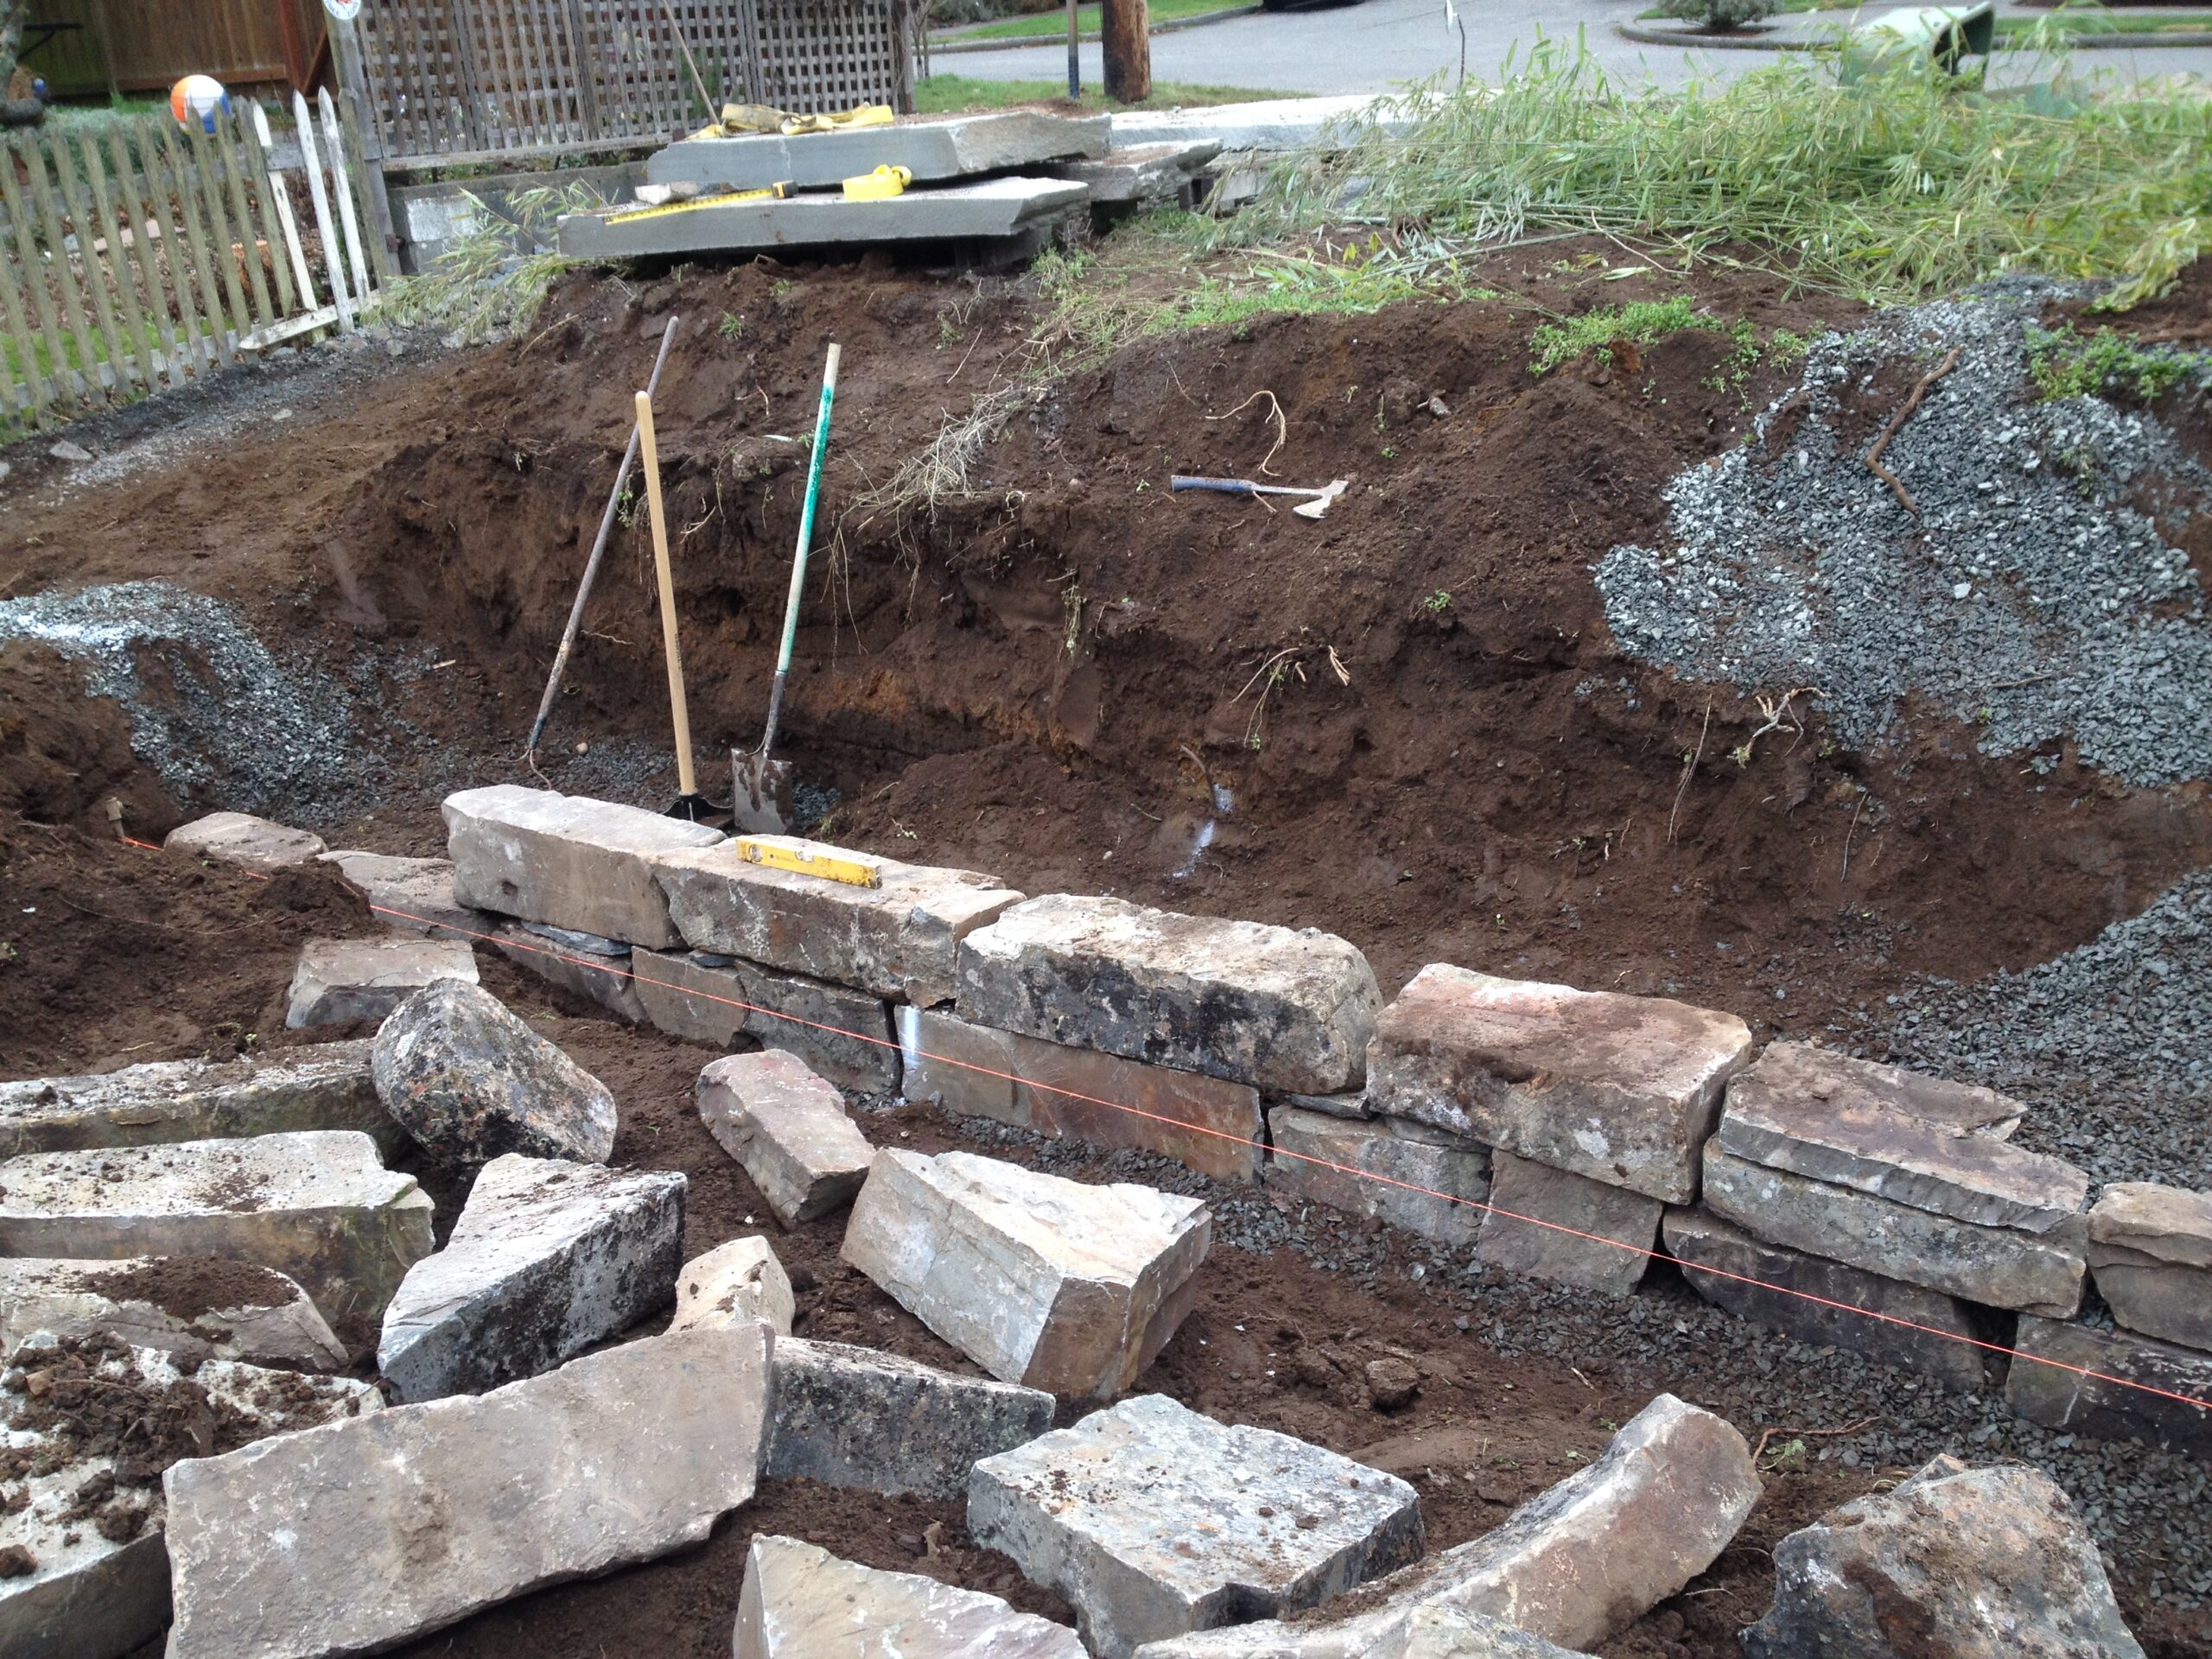
Your site should be meticulously prepared to ensure the longevity of your dry stack wall. Start by marking the layout with stakes and string, ensuring your design is clear and enticing. After establishing boundaries, excavate a trench that is approximately one foot deep and twice as wide as the stones you plan to use. This depth provides a solid footing, preventing shifting with temperature fluctuations and moisture changes.
Next, create a stable base by layering gravel or crushed stone at the bottom of the trench. This forms a drainage layer, facilitating water movement away from the wall and reducing the risk of erosion. It is often said that a strong foundation is the secret to success, and this statement rings especially true here.
Boulders and Coursing: Crafting the Structure
Now comes the exhilarating part: assembling the stones. Begin with the largest boulders, placing them on the gravel base. The key to a durable dry stack wall lies in the interlocking nature of the stones. Position them so that each stone bears the weight of the stones above it. Avoid vertical joints directly above one another; stagger the joints to increase stability.
As you build upward, be mindful of the wall’s curvature or angle. It may be purely horizontal, or it may lean slightly inward, depending on your design. Continue to fill in with smaller stones, employing a technique called “coursing,” which involves arranging stones in horizontal layers. This method not only pays homage to traditional masonry but also creates a visually appealing pattern.
Filling and Finishing Touches: A Chronicle of Detail
When your wall reaches the desired height, it’s time to fine-tune the surface. Carefully select smaller stones to fill any visible gaps, ensuring a seamless appearance. This stage is crucial—these smaller stones act as the connective tissue, binding the larger stones into a cohesive structure. Take the time to select stones that not only fit perfectly but also enhance the aesthetic appeal of your wall.
Consider adding a gentle curve to the top of the wall or a slight overhang, which serves both functional and decorative purposes. A well-finished top can help to deter water accumulation, while also providing a soft transition between your stone wall and the surrounding landscape.
Maintenance and Maturation: A Living Artistry
A dry stack stone wall is not merely built; it evolves. As it matures, the interplay between nature and artistry becomes evident. Regularly inspect the wall for any signs of movement or settling, especially after heavy rainfall or freeze-thaw cycles. Simply reposition via gentle pressure to maintain its integrity. Over time, mosses and lichens may naturally colonize the stones, adding character and a sense of belonging to the earth.
In closing, a dry stack stone wall is more than a landscape element; it is a testament to nature’s beauty and human craftsmanship. By respecting this legacy through careful planning, selection, and construction, you will create a stunning feature that not only enhances your environment but also resonates with the stories of time and place. Building such a wall is an act of love for the earth and a celebration of your personal journey through the world of stone.